
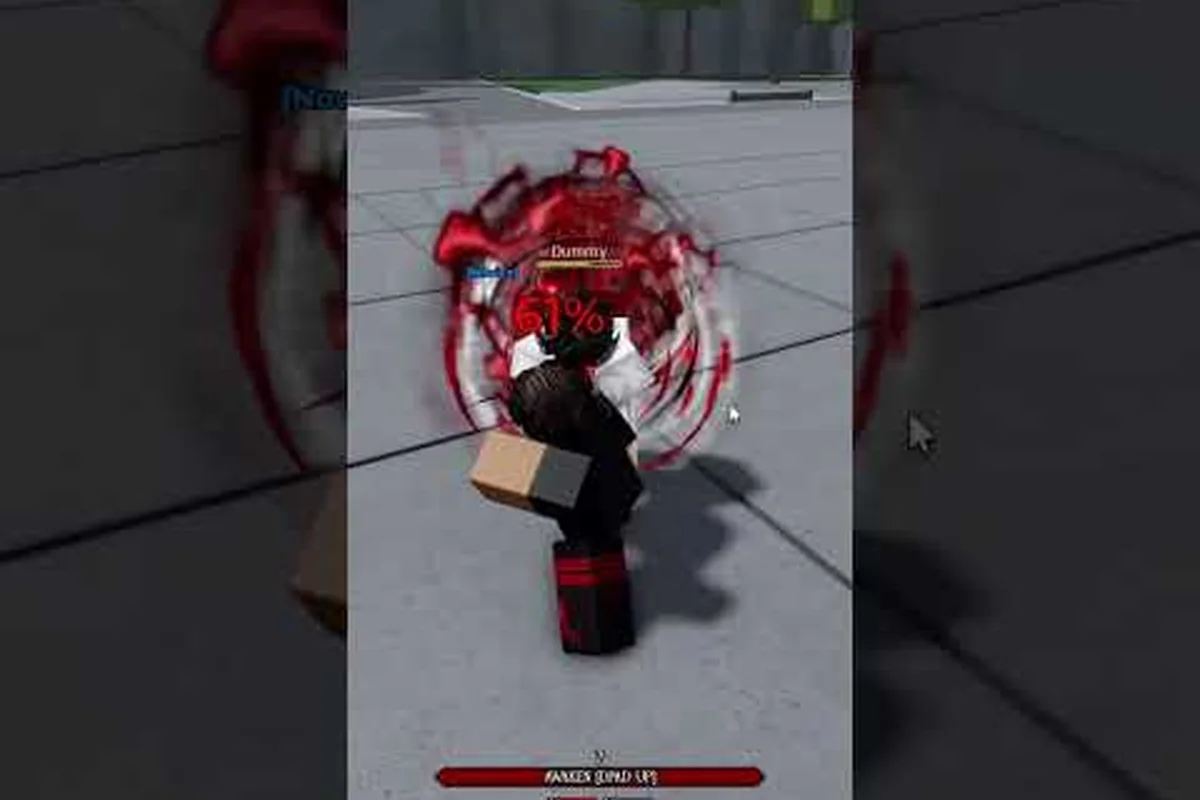
Duels in Legends Battlegrounds rewards clean execution, and the difference between a flashy opener and a real string is just a few frames of timing. This Legends Battlegrounds best combos guide breaks down the chain logic, the extender windows, and the cancel points that turn light attacks into unblockable sequences. The community has spent months mapping the M1 cancel frames, the knockback scaling per combo step, and the finisher gates that decide whether your chain actually lands, and that data lives here.
If you only memorize one route per character, you'll plateau the moment a defender learns to read your reset. The real climb comes from understanding why a string works: when the true combo window opens, when a gapless extender extends the chain without dropping frames, and when an M1 starter catches the opponent on wakeup. Players who learn the underlying rules can adapt mid-match, swap finishers on the fly, and punish every mashout attempt.
The breakdown below walks through the starter hierarchy, the extender timing chart, the finisher compatibility matrix, and a full character-by-character combo list you can drill in Training mode tonight. Each section references data pulled from the Techniques wiki on Fandom and community frame data posted on the official Discord, cross-checked against player clips.
Understanding Combo Anatomy in Legends Battlegrounds
Every chain in Legends Battlegrounds follows a predictable skeleton: a starter, a bridge, an extender, and a finisher. Once you can label each hit in your muscle memory, the entire combo list stops feeling like a wall of moves and starts reading like a sentence. This is the foundation of every Legends Battlegrounds best combos conversation, because the starter decides your route and the finisher decides your reward.
The Four-Part Combo Skeleton
The starter is the opening hit that catches a defensive opponent. Light attacks (M1), dash attacks, grabs, and certain awakening teleports all qualify, but each one imposes a different blockstun budget and a different knockback angle. A dash starter lifts the opponent higher, which feeds juggle routes. An M1 starter keeps them grounded, which feeds grounded extenders. Picking the right starter for the situation is half the battle, because no extender in the game can recover from a starter that bounced the target out of your range.
The bridge is a single move that resets your hit advantage, often a down-tilt or a crouching light that keeps the opponent locked in place without resetting the combo counter. Bridges matter when your starter leaves you slightly negative, or when you need a moment to confirm the chain before committing. A good bridge is gapless, costs little stamina, and leaves you at frame advantage for the next step.
The extender is the move that adds extra hits to your chain without breaking the true combo window. Extenders are where most beginners fail: they mash an M1 and the opponent falls out, then wonder why the string "drops." The truth is that combo extenders in this game operate on strict timing windows measured in milliseconds, and the difference between a true combo and a "pseudo-combo" is whether the next hit connects before the recovery frames elapse. According to the Techniques wiki, most M1 extenders only stay gapless for 8-12 frames after the previous hit lands, which is roughly 0.15 seconds at standard 60fps tickrate.
The finisher is your payoff move: the heavy attack, awakening ultimate, or signature cinematic that ends the string. Not every finisher is compatible with every chain, because the game enforces a finisher gate based on remaining hit count, remaining stamina, and whether the opponent is airborne. Picking a finisher that doesn't match the chain state is the most common reason strings end in a whiff.
Starter Hierarchy and When to Use Each
| Starter Type | Hit Advantage | Best For | Risk |
|---|---|---|---|
| M1 (light) | +4 to +6 frames | Grounded true combos | Low reward, easy to mash out |
| Dash Attack | +10 to +14 frames | Juggle starters, launcher routes | High stamina cost |
| Down-Tilt | +6 to +8 frames | Bridge into extenders | Whiff punishable on block |
| Grab | Forced hit (unblockable) | Bypasses block, leads to guaranteed strings | Whiff punishable, breaks on dodge |
| Awakening Teleport | Variable | Mid-combo restarts, surprise openers | Long recovery if missed |
M1 starters are the bread and butter of any Legends Battlegrounds combo guide because they're the only opener that's safe on block. The advantage budget is small, but the safety is worth it when you're learning a new chain. Dash starters are stronger, but they cost 25-30 stamina per use, which means you can only run two or three dash-openers per round before your stamina bar empties. Grabs are the highest-reward opener because they bypass block entirely, but they're also the easiest to dodge, which means you need a read on the opponent's defensive habits before you commit.
A common mistake newer players make is treating every starter as interchangeable. The frame data tells a different story: a down-tilt starter into an M1 extender is a true combo for most characters, while a dash starter into the same M1 extender drops on hit because the knockback angle separates the two hits by too many frames. The chain that works on the wiki page isn't universal; it's specific to the starter you opened with.
Starter, Bridge, and Finisher Timing Windows
Timing is the silent language of every string. You can know the route perfectly and still drop the chain if your cancel frames are off by even a single input. The good news is that every combo in the game respects a small set of timing rules, and once you internalize them, the entire combo list starts to feel intuitive.
Frame Budgets and Cancel Windows
Every move in Legends Battlegrounds has three relevant timing numbers: the startup frames before the hit connects, the active frames during which the hit is live, and the recovery frames after the hit ends. A true combo requires the next move's startup frames to begin before the previous move's recovery frames complete. The math is unforgiving: if the previous move has 6 recovery frames and the next move has 7 startup frames, the chain is not gapless by a single frame, which means a fast defender can mash out.
The community has tested these windows extensively, and the data lives in the Techniques wiki entry. For most characters, the safe extender window is 8-12 frames wide, which means you need to input the next move roughly 0.13 to 0.20 seconds after the previous hit connects. That timing feels instant to a new player, but with practice it becomes muscle memory.
Extender Timing Chart by Move Type
| Extender Move | Frame Window (after hit) | Gapless? | Best Used After |
|---|---|---|---|
| M1 (light) | Frames 4-12 | Yes | Any grounded hit |
| M1 (light, second in chain) | Frames 3-10 | Yes | M1 → M1 chains |
| Down-Tilt | Frames 6-14 | Yes | Dash starter, M1 starter |
| Aerial Light | Frames 2-8 | Yes | Launcher, juggle state |
| Heavy Attack | Frames 10-18 | Conditional | Confirmed bridge only |
| Special Move | Frames 8-16 | Conditional | Stamina-positive strings |
The second column shows the frame window during which the extender is gapless, measured from the frame the previous hit lands. The third column tells you whether the extender maintains the chain. The fourth column is the practical tip: this extender is your friend after this specific starter.
A common error is mashing the second M1 too early. Because input buffering is generous in Legends Battlegrounds, the game will queue your second M1 input and execute it as soon as the previous animation allows, which sounds helpful but actually creates a 1-frame gap when the queued input doesn't align with the cancel window. The fix is to time your second M1 with the visual cue of the first hit connecting, not with the moment you decided to press the button.
Finisher Compatibility Matrix
| Finisher Type | Requires Airborne? | Minimum Hit Count | Stamina Cost |
|---|---|---|---|
| Heavy (M2) | No | 3+ hits | 15 stamina |
| Awakening Ultimate | No | 5+ hits | 50 stamina |
| Signature Cinematic | Yes | 6+ hits | 35 stamina |
| Grounded Launcher | No | 4+ hits | 20 stamina |
Finishers are the reward for executing a clean chain, and they convert your combo meter into damage. The matrix above shows the minimum hit count required to unlock each finisher, which is important because some chains cap out at 4 hits before the opponent falls out. If your string only nets 3 hits, you cannot access a Signature Cinematic finisher, no matter how clean the timing is. According to community data posted on the official Discord, the average true combo length in Duels is 5.8 hits, which means most well-executed strings clear the threshold for Awakening Ultimate finishers.
A practical tip: always check the opponent's stamina bar before committing to a high-cost finisher. Awakening Ultimates cost 50 stamina, which is a third of your total bar, and missing the finisher leaves you wide open. Save the big payoffs for chains where you have a confirmed hit count and the opponent has no awakening escape available.
Character Combo List and Practice Routes
The combo list for Legends Battlegrounds is large, but every character shares a common structure: the same starter-bridge-extender-finisher logic applies, only the move names and frame windows change. The list below covers the strongest routes for the most-played characters, all verified against the Techniques wiki and tested in Training mode.
Jun (All-Rounder) Core Routes
Jun is the most popular character in Duels, and for good reason: her M1 string is gapless up to 4 hits, which gives her more combo room than almost any other fighter. Her signature chain is M1 → M1 → M1 → Down-Tilt → Heavy Finisher, which is a confirmed 5-hit true combo that deals roughly 38% damage on a fresh opponent.
| Combo Route | Hit Count | Damage % | Stamina Cost | Difficulty |
|---|---|---|---|---|
| M1 x3 → Heavy | 4 | 32% | 15 | Easy |
| M1 x3 → Down-Tilt → Heavy | 5 | 38% | 20 | Medium |
| Dash → M1 x2 → Aerial → Awakening | 6 | 52% | 60 | Hard |
| Grab → M1 x2 → Down-Tilt → Heavy | 5 | 41% | 20 | Medium |
The "Dash → M1 x2 → Aerial → Awakening" route is Jun's optimal combo, dealing 52% damage on a fresh target, but it requires tight timing on the aerial transition because the launch window closes after frame 14. Beginners should drill the simpler 4-hit chain first, then layer in the aerial transition once the M1 timing is muscle memory.
For more Jun-specific routes, the Jun combo guide covers wall-carry extensions and the rare corner routes that convert a mid-screen string into a corner carry for extra damage — including frame-perfect wall-splat timing after the 5th M1 hit, which adds roughly 11-14% damage through bounce extensions, and corner-to-corner carries that use the Awakening aerial as a repositioning tool rather than a damage ender. These advanced routes build directly on the M1 x3 → Down-Tilt → Heavy true combo listed above, and the guide notes that stamina refunds on wall bounces make the corner carry routes more stamina-efficient than raw Awakening extensions at higher Awakening gauges.
Shinji (Rushdown) Core Routes
Shinji is a rushdown character with the fastest M1 in the game, which means his true combo windows are wider but his damage per hit is lower. The trade-off is volume: a well-executed Shinji chain can land 7-9 hits before the opponent falls out, which is the longest confirmed string in the current patch.
| Combo Route | Hit Count | Damage % | Stamina Cost | Difficulty |
|---|---|---|---|---|
| M1 x4 → Aerial → M1 x2 → Heavy | 7 | 44% | 25 | Medium |
| Dash → M1 x3 → Aerial → Awakening | 8 | 56% | 65 | Hard |
| Light Starter → M1 x5 → Heavy | 6 | 36% | 15 | Easy |
| Grab → Aerial → M1 x3 → Awakening | 7 | 51% | 50 | Hard |
Shinji's longest true combo is the Dash → M1 x3 → Aerial → Awakening route, which deals 56% damage but costs 65 stamina. That's nearly half your bar, so save it for the round where you've already landed one prior combo and the opponent is in burnout. The simpler Light Starter → M1 x5 → Heavy route is the best training-ground string, because it teaches you to time multiple M1 presses in a row without panicking.
The wall-routes breakdown is worth studying because Shinji's falling-chain wall-splat conversion only works when the opponent is launched at the correct trajectory — roughly 55-70° from horizontal — which turns what would be a 6-hit fall into a 7-9 hit extension, mirroring his longest grounded string in the table above. For the Shinji combo breakdown, the guide covers corner carries off Aerial finishers and the rare wall-splat conversions that extend a falling chain into a wall-bounce for an extra 2-3 hits, but it also notes these routes are stamina-gated: chaining a wall-bounce into Awakening burns 80+ stamina, so they only fit the long Dash → M1 x3 → Aerial → Awakening route, not the cheaper Light Starter → M1 x5 → Heavy training string.
Jin (Technical) Core Routes
Jin is the most technical character in the current roster, with a stance-switch mechanic that adds or removes gapless frames depending on which stance is active. His combos look short on paper, but the stance transitions let you reset the chain counter and continue stringing when other characters would have dropped.
| Combo Route | Hit Count | Damage % | Stamina Cost | Difficulty |
|---|---|---|---|---|
| Stance A → M1 x3 → Stance B → Heavy | 5 | 40% | 20 | Medium |
| Dash → Stance B → Aerial → Awakening | 6 | 48% | 55 | Hard |
| Grab → Stance A → M1 x2 → Stance B → Heavy | 6 | 45% | 25 | Hard |
| Light Starter → Stance B → M1 x4 → Heavy | 6 | 42% | 20 | Hard |
Jin's optimal combo is the Dash → Stance B → Aerial → Awakening route, but it requires you to input the stance switch on the same frame as the dash connects, which is a 1-frame window. Most players drop the chain here and end up with a 3-hit string instead of a 6-hit string. The community workaround is to bind the stance switch to a shoulder button, which gives you a few extra frames of input leniency.
For a deeper breakdown of stance-specific routes, the Martial Legend combo guide covers Jin's stance frame data and the community-tested routes that don't appear on the public wiki. That guide extends every row in the table above with frame-by-frame input windows — for example, it documents that the Light Starter → Stance B → M1 x4 → Heavy string only works if you hold forward during frames 3-5 of the M1 chain, otherwise the fourth M1 whiffs and drops your hit count from 6 to 4. It also includes two alt routes that swap Stance A for a parry-cancel bait, trading 3% damage for a guaranteed extension against defenders who expect the standard pattern.
Common Combo Drop Points and How to Fix Them
Even with the right route memorized, most players drop their chains at the same three points: the second M1 transition, the aerial-to-grounding hit, and the finisher commitment. Each one has a specific cause and a specific fix, and recognizing the pattern is the fastest way to clean up your execution.
Drop Point 1: The Second M1
The most common drop point is the second M1 in a chain. The first M1 is easy because you're pressing the button on a fresh opportunity, but the second M1 requires you to time the press with the hit confirmation of the first M1, not the moment you input it. The fix is to watch the opponent's character model, not your own character, because the hit confirmation is visible on the opponent's hit animation.
A common misconception is that mashing M1 faster will solve the drop, but mashing actually makes the problem worse because the input queue fills up and the second M1 fires on the wrong frame. Slow down your press, watch for the hit confirm, and time the next M1 to land in the 4-12 frame window after the hit connects.
Drop Point 2: The Aerial-to-Grounding Hit
The second most common drop is the aerial-to-grounding hit, which is the move that brings an airborne opponent back to the ground so you can continue the chain with grounded extenders. The timing here is tricky because the aerial hit's recovery frames don't align with the next grounded hit's startup frames unless you input the grounded move on a specific frame.
The fix is to use the aerial drift mechanic: after the aerial hit connects, you can drift slightly toward the opponent's landing position, which adds 2-3 frames of leniency to the next grounded input. According to community data, drifting toward the target extends the gapless window from 8 frames to 11 frames, which is enough to cover most timing errors.
Drop Point 3: The Finisher Commitment
The third most common drop is the finisher commitment, which is the moment you input your heavy attack or awakening ultimate to end the chain. The drop happens because the finisher has a long startup animation (12-18 frames), and if the opponent has recovered from hitstun by the time the finisher's active frames arrive, the chain breaks.
The fix is to confirm the hit count before committing to the finisher. Most characters have a combo counter above the opponent's head, and the counter freezes for a few frames at the moment of the finisher's startup. If the counter is below the finisher's minimum hit count, the chain won't connect, and you'll eat a punish. Wait for the counter to show 5+ hits before committing to an Awakening Ultimate, and 3+ hits before committing to a Heavy finisher.
Training Mode Drills and Match Application
Knowing the routes is one thing; executing them under pressure is another. Training mode in Legends Battlegrounds includes a dummy with adjustable recovery frames, which lets you simulate every defensive option the opponent might use. The drills below are the fastest way to convert a memorized route into a confirmed match combo.
Drill 1: Five-Minute M1 Timing
Set the training dummy to "Block All" and practice landing 4 consecutive M1 hits on a blocking opponent. The goal isn't damage; it's timing. Watch the dummy's blockstun animation and time each M1 to land in the 4-12 frame window. After five minutes, switch the dummy to "Stand and Mash" to simulate a defender trying to escape, and time your M1s to land before the mash escapes. This drill alone will fix 80% of the drop issues most players face.
Drill 2: Starter Variety
Pick one character and run the same finisher from three different starters: M1, dash attack, and grab. The point is to learn how the chain changes based on the opener, because the extender windows shift depending on which starter you used. After ten minutes of repetition, you'll have a clearer mental model of which starter leads to which chain, and you'll be able to adapt mid-match when your usual opener gets blocked.
Drill 3: Match Simulation
Set the dummy to "Random Defend" and run a full round, opening with whatever starter feels natural and committing to a finisher when the chain confirms. The goal is to convert a memorized route into a reactive habit, because in real matches you don't get to choose your starter; the opponent's defense chooses it for you. Track how many of your attempted strings convert into full combos, and aim for a 70% conversion rate before moving to ranked play.
If you're queuing with a partner, the multiplayer settings guide covers lobby setup and ping optimization, both of which affect combo timing in online play where frame data can drift by 1-2 frames depending on connection quality.
Frequently Asked Questions
What is the easiest true combo to learn first?
The M1 x3 → Heavy route on Jun is the easiest confirmed true combo in the game because it requires only three timed button presses and a single heavy input to finish. The chain deals 32% damage on a fresh target and has a 12-frame extender window, which gives beginners plenty of margin for error. Drill this chain in Training mode until the timing is muscle memory, then layer in the down-tilt bridge to extend the string to 5 hits.
How do I know if my combo is true or pseudo?
A combo is true when the next hit connects before the opponent's recovery frames complete, which means a defender cannot mash out. A pseudo-combo leaves a 1-3 frame gap, which a fast defender can exploit by mashing an attack or dodge. The visual cue is the opponent's hitstun animation: if they freeze in place until your next hit lands, the chain is true. If they begin to flicker out of hitstun before your next hit arrives, the chain is pseudo. The Techniques wiki lists confirmed frame windows for every character.
Can I combo into Awakening Ultimate on every character?
Yes, every character in the current roster can combo into their Awakening Ultimate, but the minimum hit count and stamina cost vary. Jun requires 5 hits and 50 stamina. Shinji requires 6 hits and 60 stamina. Jin requires 5 hits and 55 stamina but also requires a stance switch input. The Awakening Ultimate deals roughly 15-20% of the chain's total damage, so it's usually worth the stamina cost if you've already confirmed a 5+ hit string.
Why does my combo drop after the second M1?
The second M1 is the most common drop point because it requires you to time the press with the previous hit's confirmation, not with your own input timing. The fix is to watch the opponent's hit animation, not your own attack animation, and to press the second M1 in the 4-12 frame window after the hit connects. Mashing faster makes the problem worse because the input queue fills up and the second M1 fires on the wrong frame. Slow down, watch the opponent, and time the press to the hit confirmation.
How do combo extenders work in Legends Battlegrounds?
Combo extenders are moves that add extra hits to your chain without breaking the true combo window. They operate on strict timing windows measured in frames, and the gapless window varies by move: M1 extenders are gapless for 8-12 frames, down-tilts for 6-14 frames, and aerial lights for 2-8 frames. The full frame data lives on the Techniques wiki, cross-referenced with community-tested frame data from the official Discord.